Subject
- #Channel Organization
- #Paid Features
- #Slack
- #Collaboration Tool
- #Collaboration Tools
Created: 2024-10-08
Created: 2024-10-08 09:30
This guide explains how to use channel section options in Slack. Think of it as a way to group and organize numerous channels.
Advantage 1 : It can be used as a powerful tool to organize a large number of complex channels.
Advantage 2 : Even with the same channel list, each individual can set different sections.
Disadvantage 1 : Newly invited members will not have any sections created, so each individual must set them up themselves.
Disadvantage 2 : It is only available in the paid version.
Basic Considerations Before Using Sections : For newly invited members, if the channel names are not organized, it can look messy and confusing. Therefore, organizing channel names should be prioritized.
※ Article on Organizing Channel Names reference link
Paid version (Pro) or higher required
All members and guests using multiple channelscan also use it
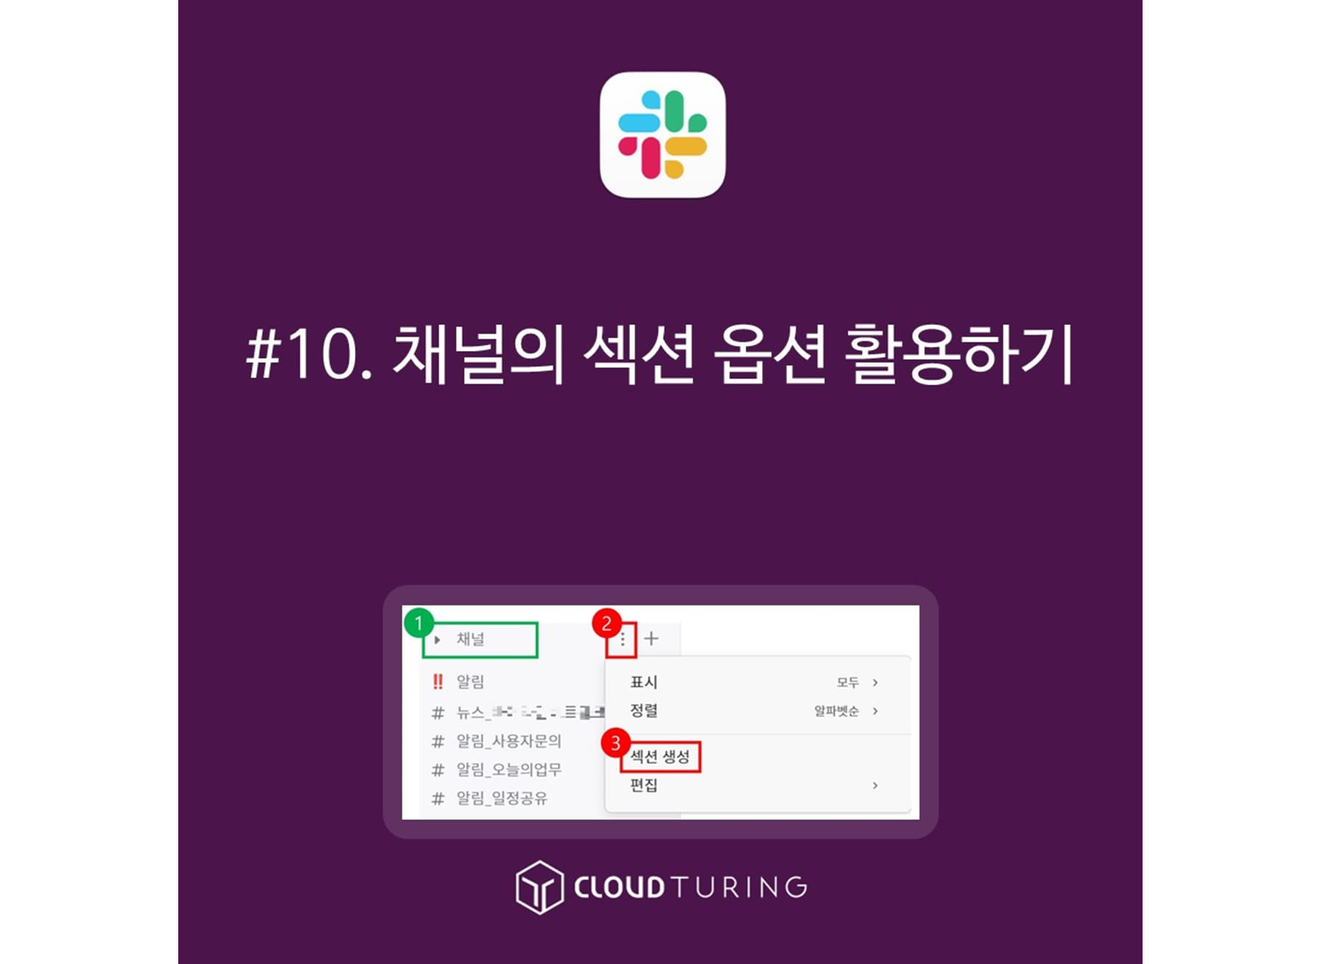
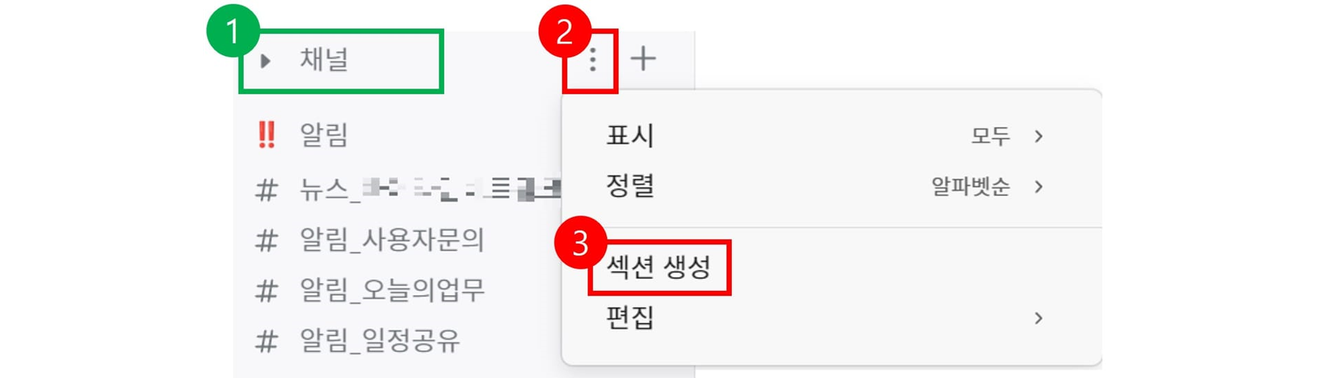
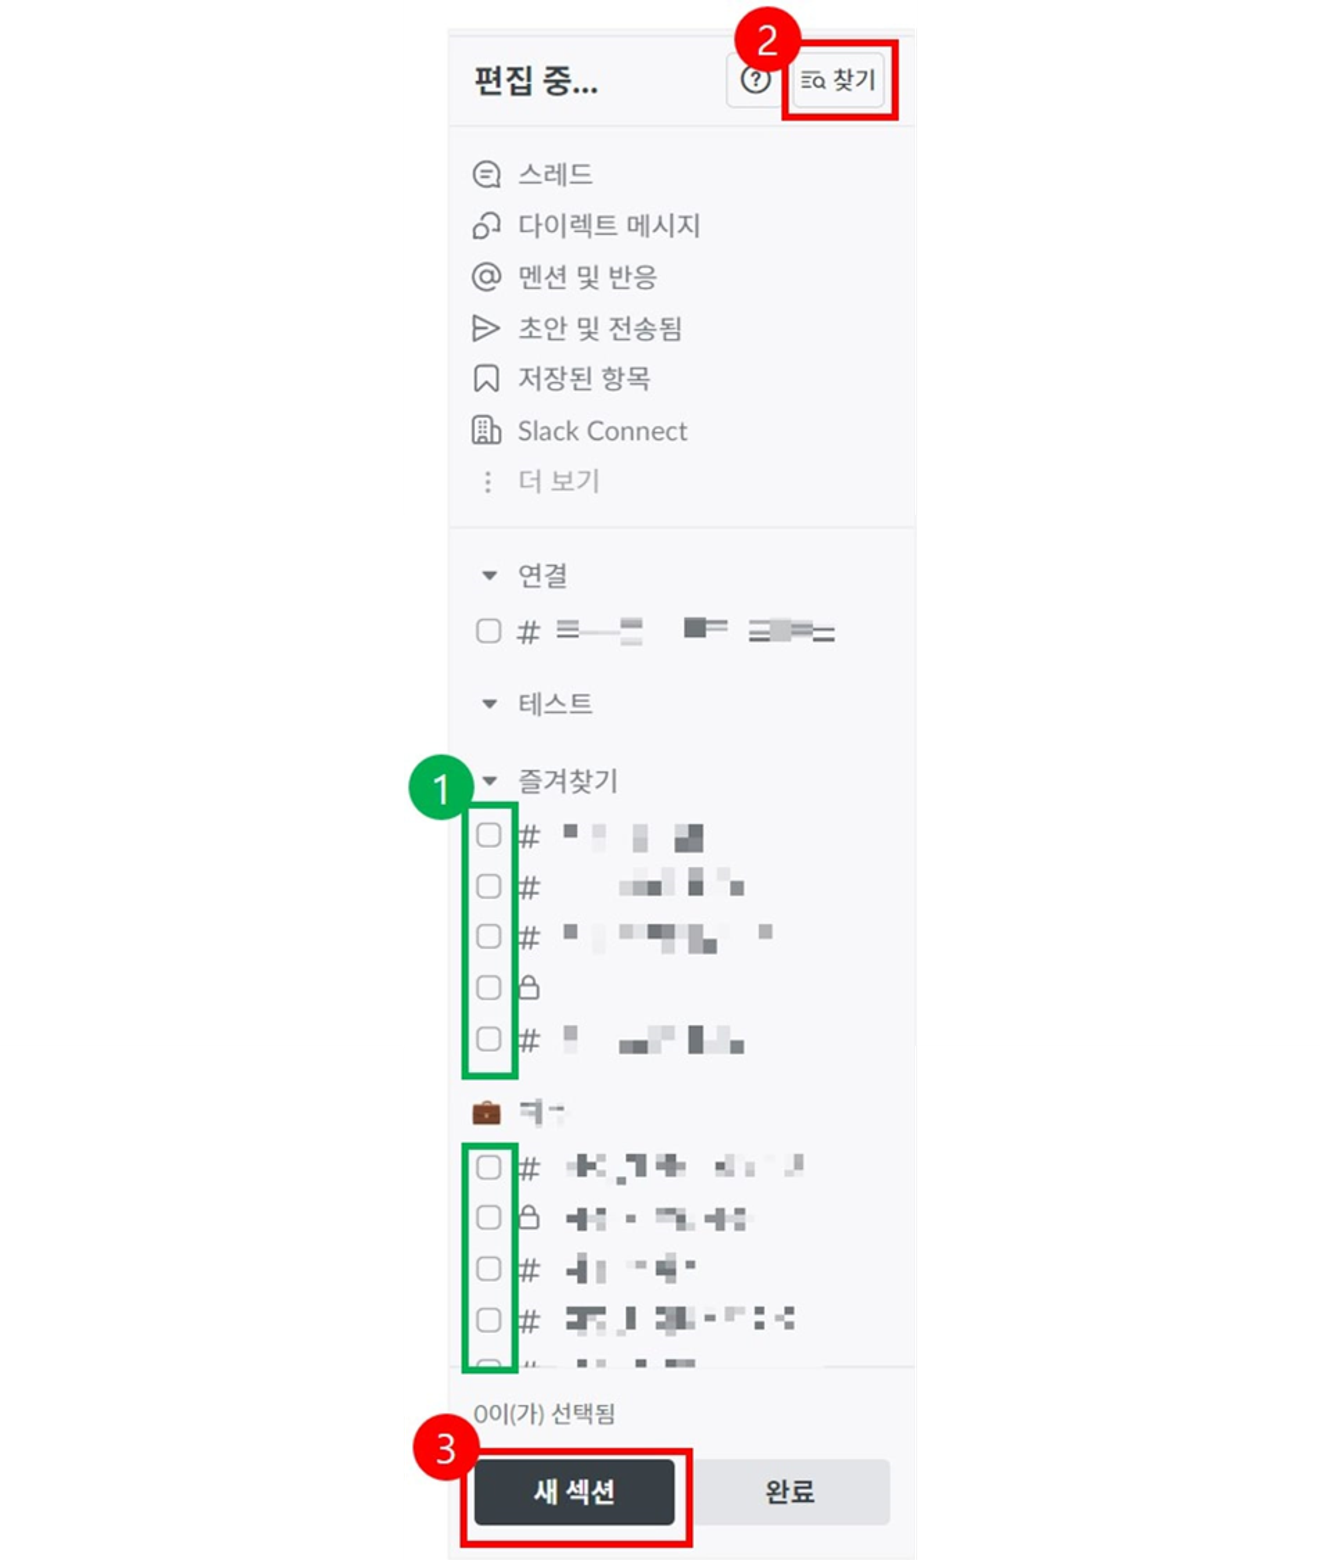
1. Hover your mouse over the [channel] name.
2. A [three-dot button] will appear; click this button.
3. Click the [Create Section] button.
4. ① It says "Choose a helpful name", enter an appropriate section name in this area.
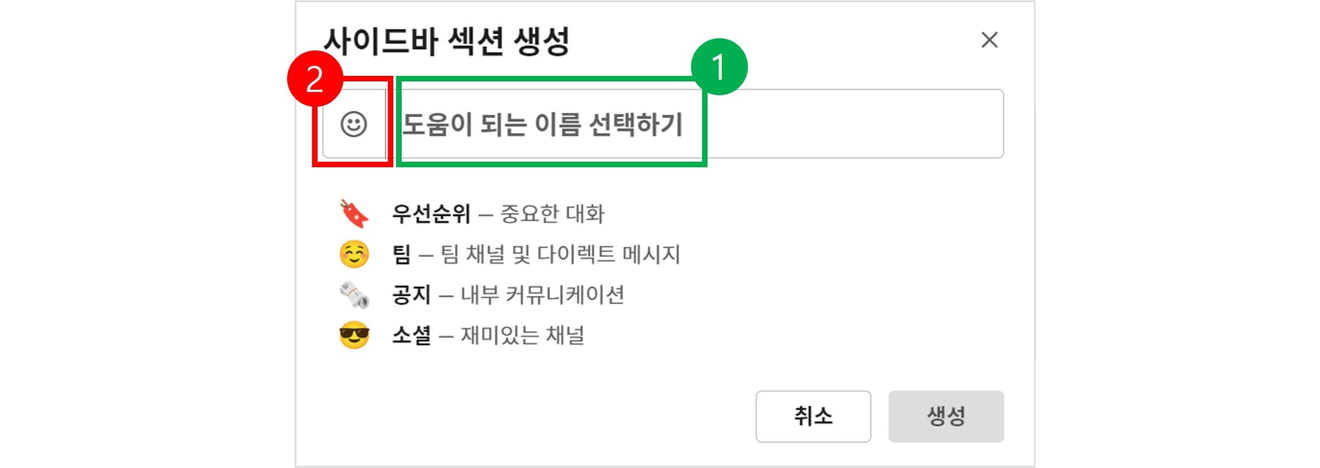
5. After typing the section name, click [Create].

6. Once created, only the section is generated; no channels are included.
Invalid Date
November 17, 2024
February 5, 2024
January 16, 2025
August 15, 2025
May 28, 2024
Comments0